Sunday 26 October 2014

Pins and Needles Sewing Supplies Shop Update, plus other things

Long overdue update time! I actually completed this shop about a month ago, but didn't manage to take photos I was satisfied with until now.

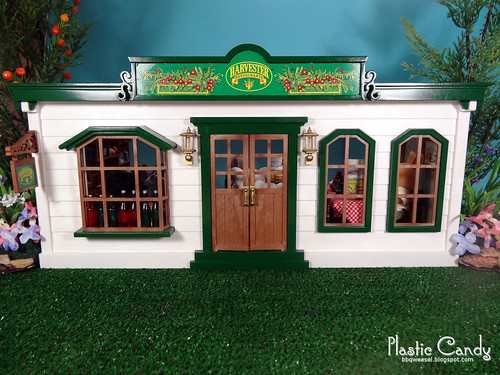
Introducing the Pins and Needles sewing supplies store, your one stop shop for all your sewing needs. This shop contains craft books and magazines, thread, a nice selection of fabrics, paints, buttons, sewing machines etc.

Pins and Needles Sewing Supplies


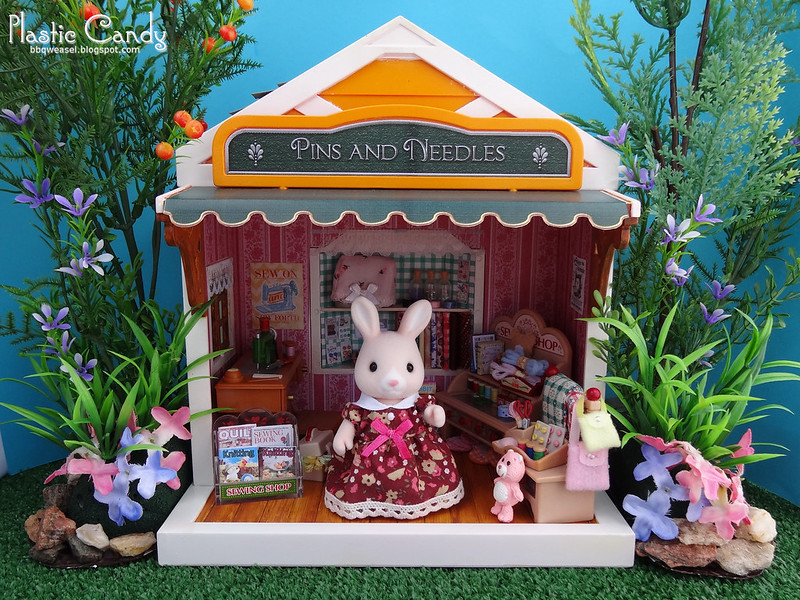
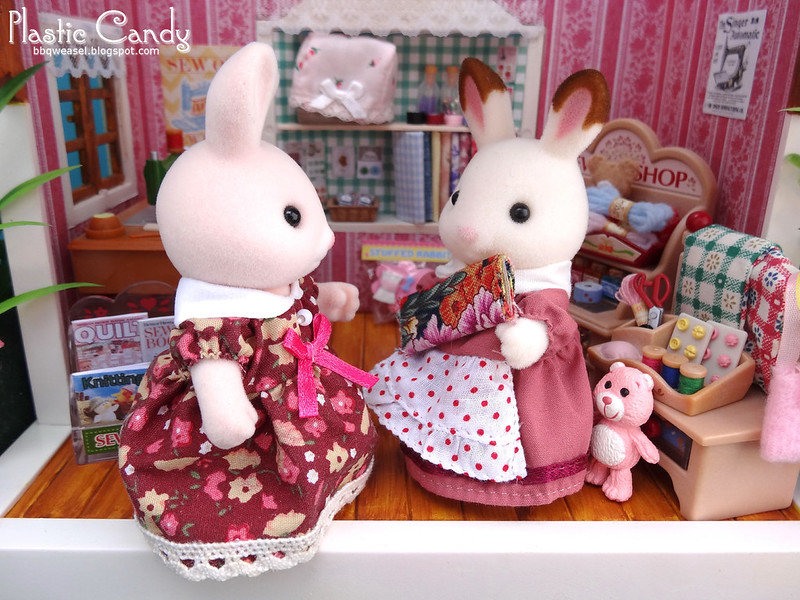
Meet Adrianne Hopkins, the proprietress of Pins and Needles.

Adrianne Hopkins, Owner of Pins and Needles

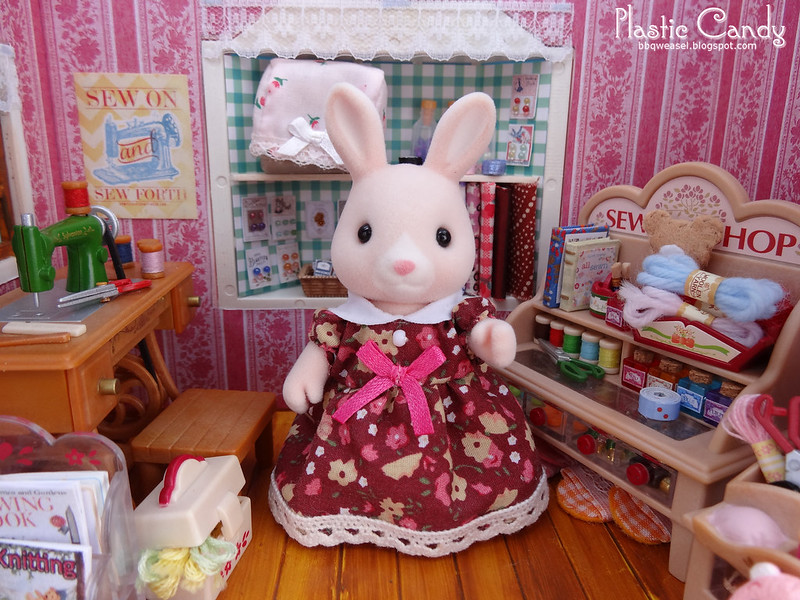
I had originally considered either a Dandelion rabbit or Silk cat mother as the owner, but I thought that Adrianne and her colour scheme fit in there really well. I love the Hopkins Champagne rabbits. They are a soft pink colour and their flocking is so, so soft! I added a lace trim to her dress. Her original stock photos had a lace trim, but the final release came without (unfortunate, because she looks much fancier with some extra lace). I just glued it on because I suck at sewing.
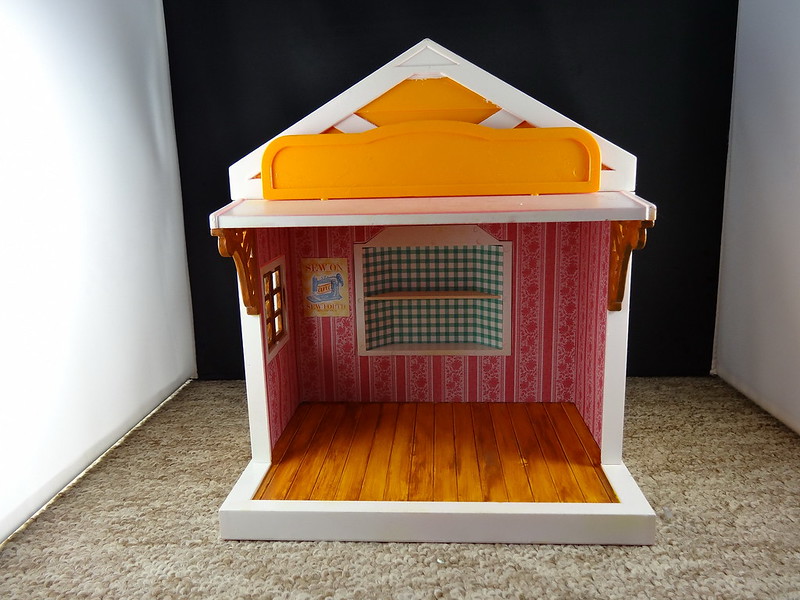
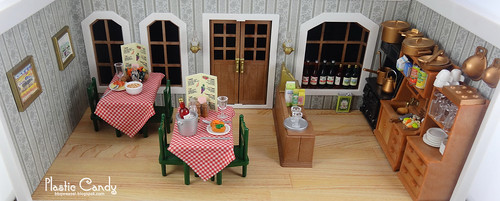
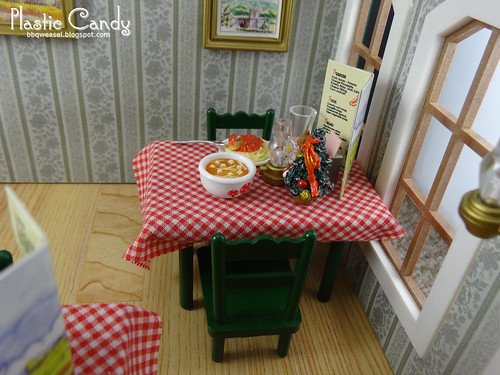

Interior shot

Sewing shop interior


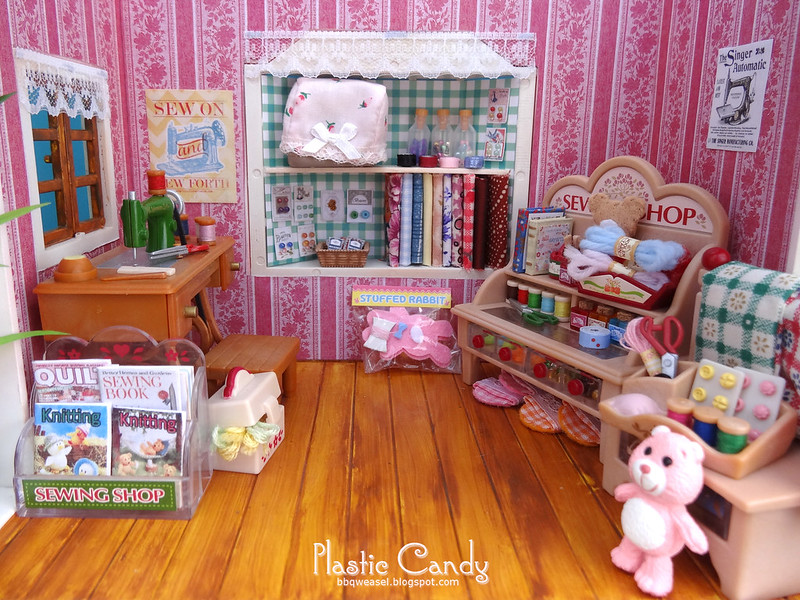
Little Re-Ment Care Bear. I used to have him in Mulberry's Toy Store, but he just fits so well in here, I couldn't resist.

Little Care Bear


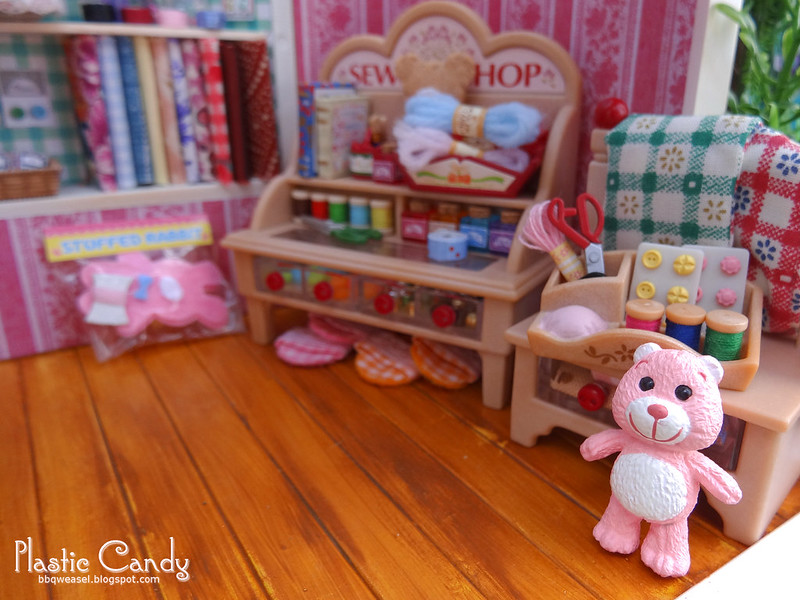
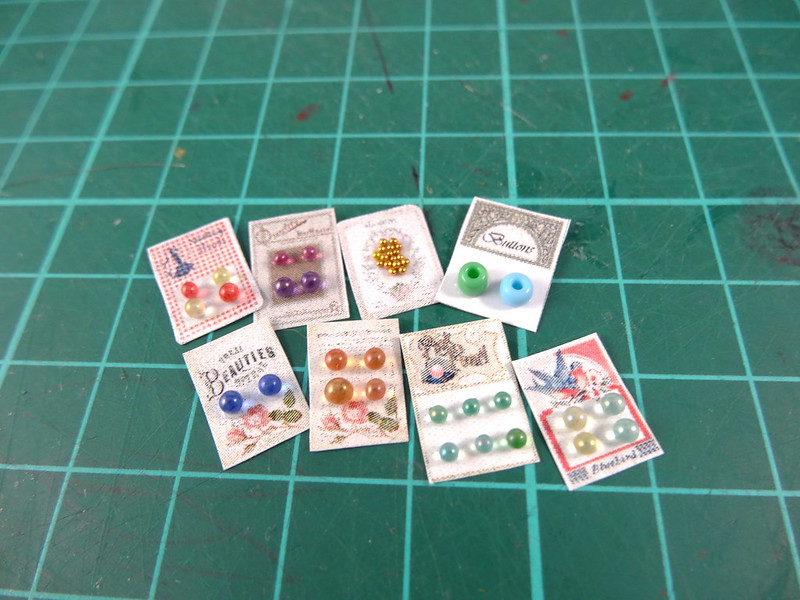
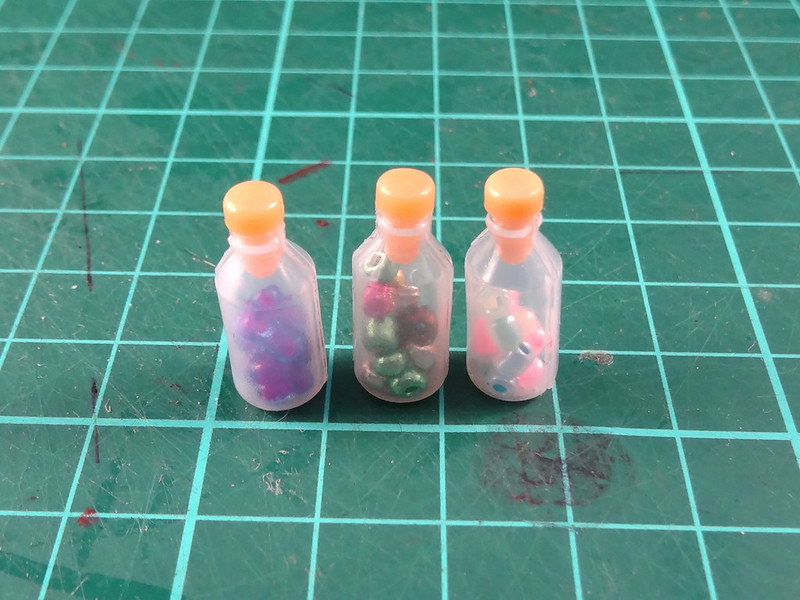
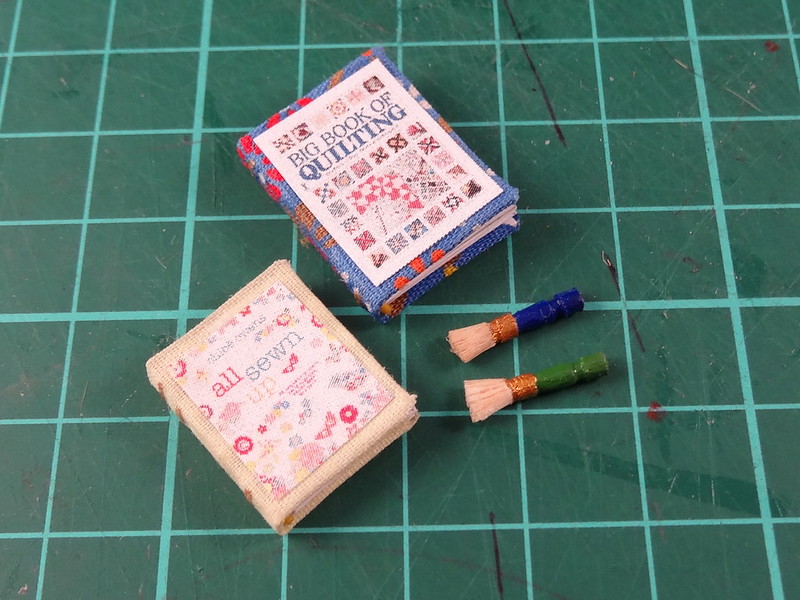
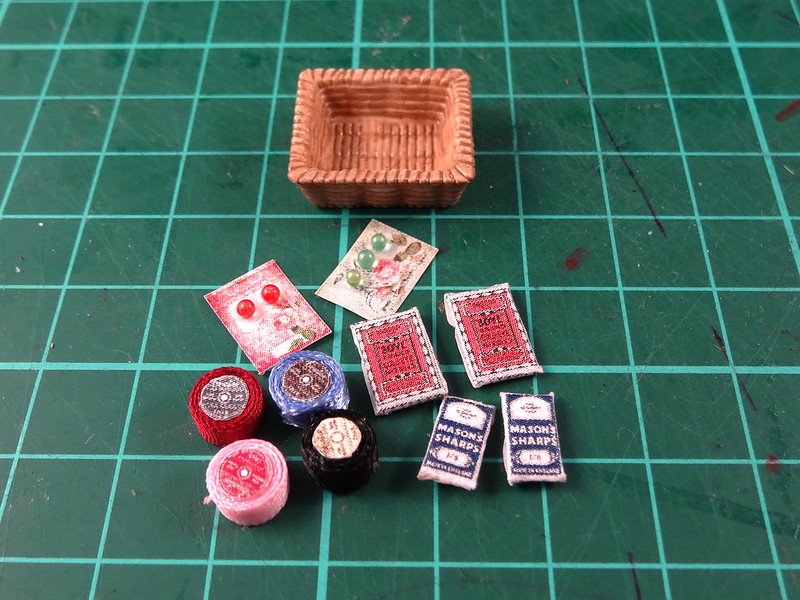
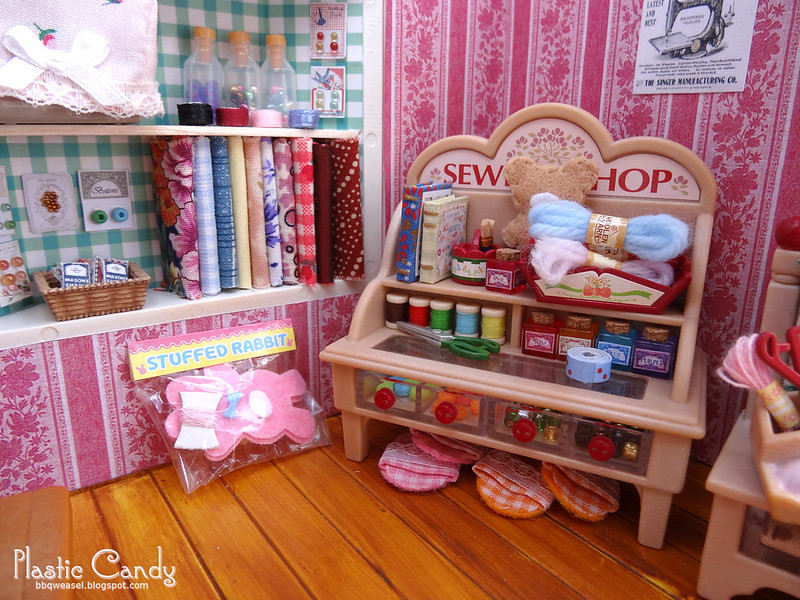
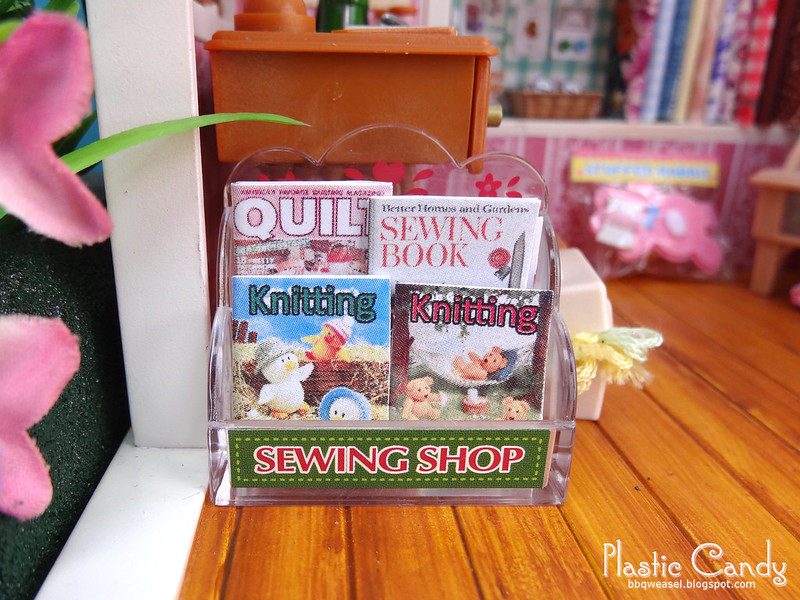
Goodies for sale. I did my best to make up for the missing bits in my sewing set and added extra items like the books and more beads. No way did the original set come with enough beads!

Sewing goodies closeup


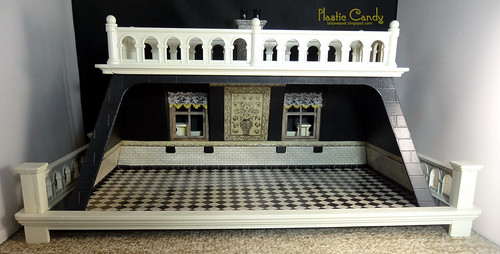
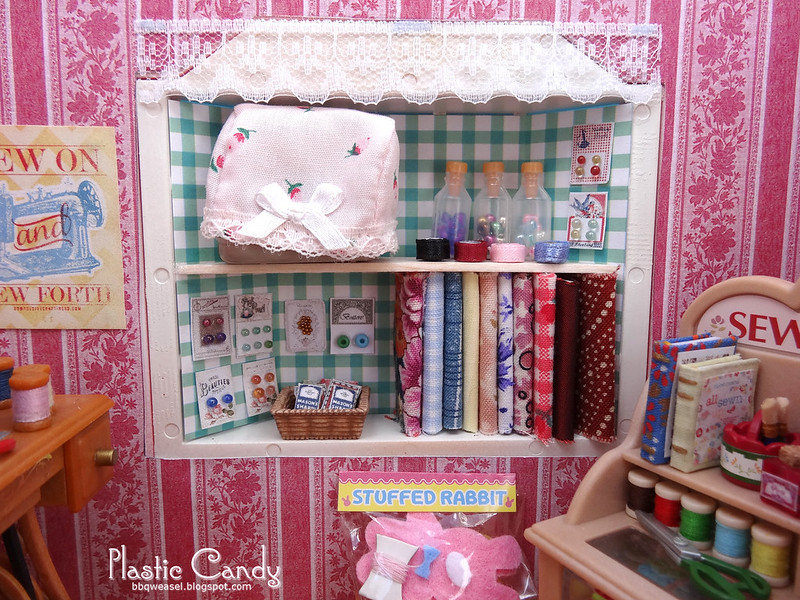
Bay window turned into shelves. I don't think I really have enough fabric for a sewing shop, but it'll have to do. It's already pretty cramped in there.

Stocked shelves


A green, vintage Singer, the pride of Pins and Needles. Not for sale, it's Adrianne's personal machine that she inherited from her mother.

Vintage Singer

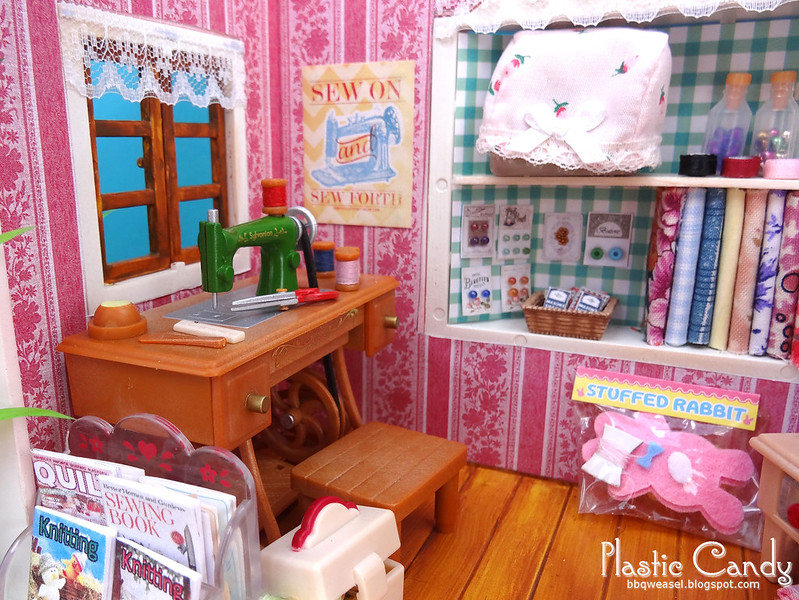
I love this piece. I kind of wish I had the black version too, but green's pretty good.


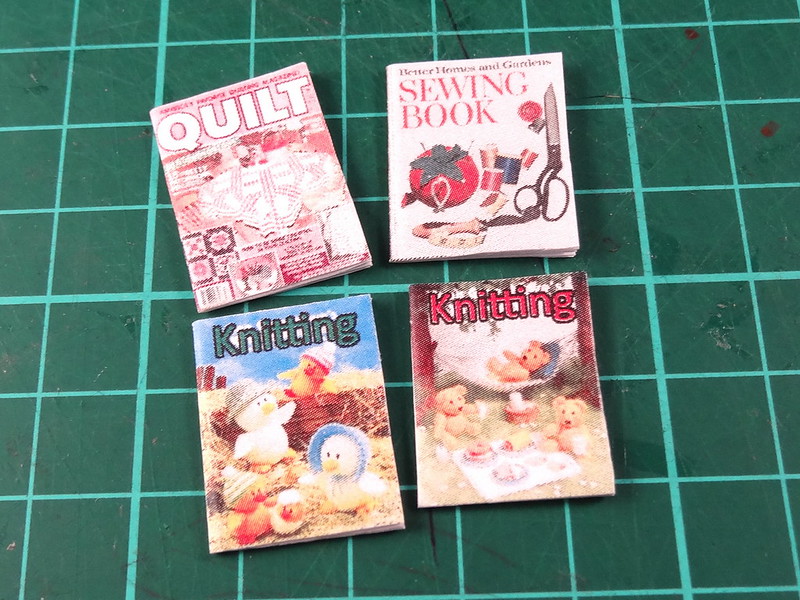
Sewing and knitting magazines.

Craft magazines


Buy the bolt! I almost named Pins and Needles 'By the Bolt'. XD

Buy the Bolt

And that's all for the shop. I might add some dress forms to the outside later, but hadn't really thought about it when I was taking the pictures. I also need to make better back drops and add more plants. The same two pieces of shrubbery is getting old.

---

I've done a review on this old Sylvanian school set on the forums here.

Also, I went to The Reject Shop last weekend and picked up this little guy.

Candy Apple pony

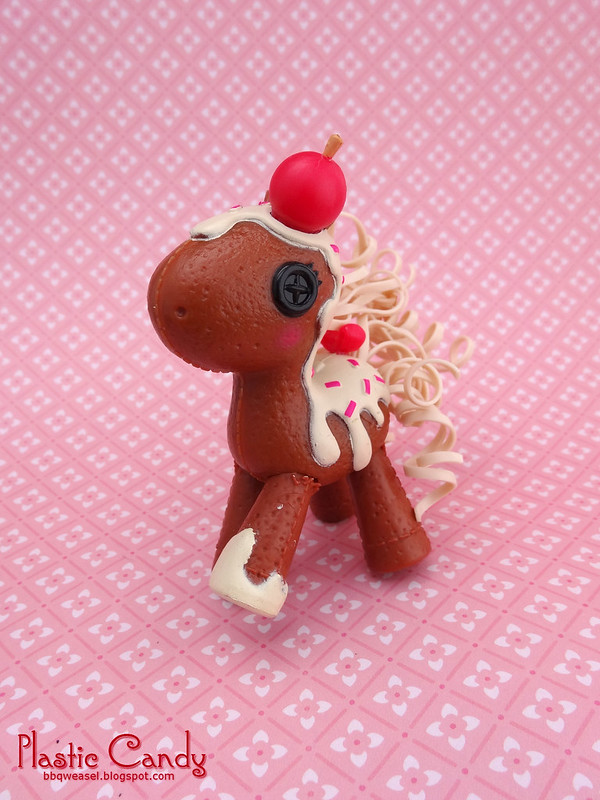
Lalaloopsy candy pony! This one is called Mocha. I really, really wanted to like Waffles, because the concept of a unicorn with a smooshed ice cream cone on its head acting as its horn cracked me up. But Waffles has a really ugly bib molded on him. Just could not get over that silly bib. Mocha is really cute though.

Thursday 4 September 2014

Pins and Needles sewing supply store - WIP

I've been working on this on and off for a while. I got the Sylvanian Sewing Shop from Wendy a few years back, and even though it's one of my favourite sets, I've not really done much with it. I had originally wanted to fit it into the TOMY boutique, but there was barely enough space for all the original accessories much less the sewing shop.

I decided to customise one of the small cottage shop buildings for this. I used the pink building from the Madeline's Boutique release (Ms Madeline already has a nicely outfitted shop in my village). The pink building is one of my least favourites. There's something really un-Sylvanian about it. Most SF buildings tend to come in natural shades of brown and cream, and even when there's a pink building (the Urban Life Cafe Terrace springs to mind), it's not obnoxiously bright like this one is.

Before painting

I had considered using light pink and white, but I settled for a bright yellow and white instead. I'm glad I did, I like the yellow! I also got rid of the bay window and put in a balsa wood shelf. I really liked how the bay window looked, but there really isn't enough space for a lot in these little shops. I decided to put in the shelf after seeing moonrabbit_ly's photos of her sewing setup. There's not going to be enough stuff in my shop! No ribbon, not enough buttons, and especially no fabric. What kind of sewing supplies store has no selection of fabric?

After painting

Anyway, I started work on the accessories. Here are some buttons. I used micro beads I found at a cheap shop a couple of years back for most of them. I regret I didn't try to do a pattern with the tiny gold micro beads to make it look like one of those cards with fake gems on it.

Buttons

I saw this on the Crafty Ladybug's site years ago. I cut the tip off those useless UK baby bottles and sanded the tops down and filled them with beads. I'm pleased by how natural the tops ended up looking--like they were always meant to look this way. :)

Re-purposed Sylvanian baby bottles.

I also made some magazines, and a couple of books. The book covers were made using fabric. I love how the quilting book turned out. I was missing the paint brushes from the sewing shop, so I made some out of the ends of a couple of cocktail toothpicks. The fancy ends make for awesome brushes. To make the bristles, I chewed on the ends to make it split.

Little craft magazines

Craft books and brushes

I'm also missing the original bottles of fabric paint from the sewing shop, so I made my own with some beads and cork paper. I guess I could have made the lids with polymer clay, but at the time I CBF.

DIY fabric paint bottles

There was some extra space on the shelves so I found an extra SF tray, painted it and filled it with goodies. The little packets are supposed to be packets of pins and needles. For the ribbon I used craft ribbon and those annoying little ribbons that come sewn on the shoulders of women's tops. I think they're for hanging the tops or something? I generally find them annoying so I cut them off.

Sharps, buttons and ribbon

After making those accessories, I looked at the little spools of thread and they just don't look 'real' enough when placed next to all the other stuff. I decided to be extra picky and wind real thread around them.

Comparison

I've only got to make the sign, awning and the roof tiles and the shop will be complete. And maybe I'll be able to take better pictures of it after that. The pictures for this entry have been pretty dismal.

Sunday 22 June 2014

Space Hammy

For a Design a Villager Animal Crossing contest on the Australian ANC Facebook page. Draw an original character and come up with a profile, basically.

'Say hello to Sam, the jock space hamster. He very badly wants to go to space, and he's currently training to fulfill his dream of becoming an astronaut. He wears a space suit and helmet everyday to remind him to work towards his dream. Sometimes you'll see him bouncing on his trampoline to simulate the weightlessness of space. He also knows a lot of facts and trivia about rockets and outer space, and he will occasionally share his knowledge with other people. He was named after a Spaceman Sam his parents found in a meteorite crater.

His greeting is, "Up, up and away!" and his catchphrase is "great galaxies". If you get his picture, it'll say, "Never give up and reach for the stars!" behind it.'

I originally drew a gardening bunny, but a hamster riding a coin operated rocket was too hard to resist.

SPAAAAAAAACE

Monday 2 June 2014

New blog layout

New blog layout! I'm aiming for something simpler. The previous layout was a headache, and I couldn't figure out how to increase the body width.

This is the second thing I've ever finished painting on the computer. I used Easy Paint Tool Sai. That program is SO AWESOME. I love the lineart layer function and the stabilizer. Especially the stabilizer, I have shaky drawing hands like you can't believe. I've learned so much painting this. I think it's a good improvement on my previous CG work.

Thursday 8 May 2014

The Candyman Comes

I've been away from this blog for a while. At first I went overseas for a month--back to my home country visit all my friends and family. I really miss jungles. And I've noticed that my body no longer can tolerate tropical heat as well as it used to. :( I used to be able to wear ankle length skirts and long sleeves in that weather and feel nothing. Now I need shorts and short sleeves.

I've also been focusing on my studies for the past couple of months. Some of it's over now. Anyway, two new pictures!


Mr Marmalade and his sweet cart

I really love the old Megahouse miniatures. It's really too bad that they stopped making them. The old Megahouse panda candy cart scales perfectly with the larger adult Sylvanians. Most of the current adults aren't as big as the old bear molds so they don't work as well. I originally had father Timbertop as the owner, but after I got this Marmalade bear, I decided that his clothes looked more like a candyman's should.

I love the little Megahouse candy. I'm missing about two or three of the sets, but I couldn't cram much more on the cart anyway. I should take more close up pictures of the contents of the cart.

The Customer
Mr Marmalade: That'll be $56.

Jack: What? For a candy bar? That's crazy!

Mr Marmalade: It's vintage. That's the last one I have from 1958.

Jack: I don't think I want this any more.

Friday 17 January 2014

Grand Mansion Update

I finally resumed work on the Grand Mansion. You can check out the previous updates here and here.

I stopped mostly because of the attic. It is such and awkward shape that it was a massive pain in the ass to create a wallpaper template for. Plus I was having trouble with the flooring I had chosen too. I decided that rather than wallpapering the entire wall, I would just paint the insides a matte black and wallpaper the lower half.

And the trouble with the floor tiles I was talking about? I was using this texture from Filter Forge to make my floor, but I wanted it standing on it's pointy ends, like diamonds. Guess what I did? I tried to manually rotate the texture. That was a real pain and a half to get *exactly* right (I didn't). Yeah, it hadn't occurred to me to just type in move 45°. *facepalm*

Wallpapering WIP


The next step after wallpapering was to mask the thing so I could apply several coats of glossy paint to the 'tiles'. I know, I should have sprayed before wallpapering, but it was dark out and I was impatient to move the project along.

Spraying gloss


Look, all nice and shiny now. It warped a little, which I expected. The effect is more apparent in person. The tile mosiac in the middle was originally blue. I Photoshopped it into this sepia colour before printing it out.

Shiny new bathroom


This also happened when I sprayed this wall with gloss. No idea what happened there. Didn't affect the other walls.

Dirt on wall


Now, for the furnishings. These things have been languishing unceremoniously in a box since I got them. I've used the old TOMY Sylvanian sink and a fancy toilet released for the hotel theme. The TOMY sink is very good quality--it's made of ceramic and the tap and pipes are actual metal. In contrast, the toilet is a sad, cheap feeling thing of thin plastic. Yeah, some of the old SF stuff is just so much nicer.

The carpet is just a print out. I'm too cheap to splurge on proper dollhouse carpets, and printing them allows me to control exactly what size I want it. I probably should look into printing on textured paper, though.

Sink and toilet


On the other side of the bathroom, we have the bathtub. It's another TOMY piece, and is made of nice weighty ceramic. Like the sink, the taps and pipes are made of solid metal. The shower is actually removable. There's an option to use a handheld shower instead, but I prefer the big shower. In real life, I prefer a handheld. :P

The coat rack is a bootleg. I'm wondering if I should leave it as it is, or repaint it; and if so, what colour?

Bathtub

Here is the whole bathroom, all in one picture. Click for bigger.

Fully furnished bathroom.

I've also created some pictures for the walls of the mansion. I printed them out and used painted balsa wood as backing. I was reluctant to buy proper dollhouse picture frames because of how many I needed and how costly they would all end up being. I also like the fact that I can directly control the size and what I put in those frames. I'll have to print out more geeky pictures next time, and less generic ones. As it is, I already have a picture of Rivendell in one of the silver frames.

DIY mini picture frames


I think it looks quite good in a room. Here it is with fizzy fish. It lives in the Grand Mansion now.

Fish and Picture

Friday 10 January 2014

The Harvester Restaurant and some trade items

A while back I bought a Harvester Restaurant on Ebay. After much hunting, I found one within the country and surprisingly, it came with most of its accessories. I think the only things that were missing were a few of the clear glasses. It even had little circle cardboard cut outs of food which I didn't know came with the restaurant.

I decided to wallpaper it and use some of my Kabaya SF kitchen miniatures to decorate it. The Kabaya stuff was originally produced for the Kitchen Restaurant building, but it works well here as well. I don't have the Kitchen Restaurant (but badly want one!).

I need to improve my photography skills. I'm quite bad at it. I keep seeing all these gorgeous doll and toy photography on Flickr and get so frustrated by my lack of skill and understanding. The 'sky' shouldn't have tree shadows on it, haha.

Harvester restaurant front

Here's an interior shot. The wallpaper I found on a dollhouse site and I adjusted the colours in Photoshop until it was a nice shade of green. It was originally cream. That wallpaper suddenly makes the place look extra classy. (click on the pictures to see a bigger version)

Harvester Restaurant

Here's an interior shot with critters. I spent SO much time taking this picture. I've given up trying to make it look awesome. I'm leaving it as it is. I didn't set up the foremost table for two so it looks like Mrs Outback Koala has caught Mr Outback going out for a fancy-pants meal all on his own without inviting the rest of his family.

Carissa Outback: Bruce! So this is where you've been sneaking out to every afternoon! I thought you were having an affair! This also explains all that extra weight you've been putting on lately...

Busy Harvester Restaurant

Here's a picture of the kitchen side of things. I love how crowded it looks! I've since rearranged things so stuff fits better. All the cans have been moved to the top shelf; much more space for them there. The cans all have a Cottontail chef on it. I guess he's some locally famous chef with his own brand of food stuff in Sylvania, heh.

Cooking space

I've also got a tin of Cottontail brand olive oil. Might have to go to my Flickr to get a close up. I haven't figured out how to widen the margins on this template to accommodate larger pictures without messing up the rest of the layout.

I was surprised that this set came with all its bottle labels too. Some are wine labels and some are syrup labels. I superglued all the labels back on as they were either falling off or plain loose. Says a lot about the quality of Sylvanian wine that the wine's the same neon red and green as the syrup...

Cottontail brand olive oil

I made two of the cans for the kitchen. The Kabaya sets did not provide enough cans for all the can labels they had--they expected you to choose which labels  you liked best. Imagine that! Of course I can't choose! The only solution was to make a silicone mold of the cans and cast them in resin.

Resin cans

Turned out quite well, I'd say.

Finished cans

Here are some close up interior shots:

Long ago, I bought a little container of glass miniature 'ice' from Etsy. I've used it to fill the bucket. It's a right pain when they spill, I tell you. And of course that red wine has to be kept under ice. Just look at it. Anything that bright red has got to be volatile. I also know I got the knife and fork placement wrong. Just couldn't be arsed retaking the pic.

Meal

Here's what the other table has. Some spaghetti and mushroom soup, with a nice glass of red. The spagehetti is from the Kabaya sets, just re-plated as the Kabaya plates are huge. They're very pretty plates, just really big for the little SF tables. The mushroom soup and Christmas tree is from Re-Ment, and the nice red wine glass is from Orcara's fantastic red wine set.

mushroom meal


A bowl of mushroom soup and spaghetti

That's it for the Harvester restaurant pics.

I've also finally finished my end of the trade for a very nice lady on the SF forums. She's waited very patiently over a year for this. I've made a ton of extras to make up for my lateness, which made me even later, so that wasn't the best way to go about things...


Trade items

Friday 3 January 2014

New forum and Japanese room set review

The Sylvanian Families community has moved! LadyLollipop has graciously offered to host and set up a new forum. Runboard was a bit limited where features were concerned.

Come join us at the new forum here: http://sylvanianfamiliesforum.co.za/ and help the community grow!

I've also done a review of the old Japanese room set over there.
Sylvanian Families Japanese Room
Review link: http://sylvanianfamiliesforum.co.za/phpbb/viewtopic.php?f=10&t=160

Here are a few pictures:
I used a Mulberry mother to model this. I'm pretty sure the outfit was meant for a male, but the mother's dress was easier to get off. Not that it matters anyway, Sylvanians are mostly the same without clothes.
Hanten
I had to take a picture of a Pinky. They are the reason I even have this set. I'm certainly not paying current ebay prices for them now! I got it way back, before I was into SF because I thought it looked fantastic with them. I've never taken a picture of any of them with it until now. I'm sad Pinky: St isn't releasing regularly anymore. That's what made me lose interest and turn to SF. I'd forgotten how cute they can be.
Pinky St, looking cute